Running Multiple Different PHP Versions Simultaneously on Ubuntu 24.04

Monday, August 18th, 2025

Running Multiple Different PHP Versions Simultaneously on Ubuntu 24.04

If you need to run multiple different versions of PHP simultaneously on your Ubuntu server, it can be done.  This is needed when you want to host some legacy sites that cannot run with the breaking changes made in the newest versions of PHP (shame on you PHP for doing such nonsense). 

Here's how I did it on an Ubuntu 24.04 server which uses PHP 8.3 by default.  In this example, I have already installed and configured all web server software packages including PHP 8.3.  The EHCP Force installer can do this for you if you don't know how to install and configure everything you need to run your own web server.

Add the ondrej repo and install PHP 5.6 and 7.4:

sudo add-apt-repository -y ppa:ondrej/php
sudo apt update
sudo apt upgrade
sudo apt-get install php5.6 php5.6-fpm php7.4 php7.4-fpm
sudo apt-get install php7.4-mysql php5.6-mysql php5.6-mysqlnd-ms php7.4-gd php5.6-gd php5.6-zip php7.4-zip php7.4-cli php5.6-cli php5.6-mcrypt php7.4-mcrypt php7.4-gettext php5.6-gettext php5.6-mailparse php7.4-mailparse php7.4-imagick php5.6-imagick php5.6-curl php7.4-curl php7.4-xmlrpc php5.6-xmlrpc php5.6-imap php7.4-imap

I then adjusted the fpm php.ini files in the /etc/php/5.6/fpm/ and /etc/php/7.4/fpm directories to use custom settings that I use (optional).  I then edited the FPM pool for each version of PHP in the www.conf file in /etc/php/7.4/fpm/pool.d and /etc/php/5.6/fpm/pool.d directories to listen on a different port than PHP 8.3.  For example, for PHP 7.4, I changed the listen port to 9011.

Then, for the particular website I wanted to run under a different version of PHP, I changed the nginx template to use the corresponding port for the desired PHP FPM version like so:

location ~ \.php$ {
        root {homedir}/httpdocs;
        include fastcgi_params;
        try_files $uri = 404;
        fastcgi_pass   127.0.0.1:9011;
        fastcgi_index  index.php;
        fastcgi_param  SCRIPT_FILENAME  $document_root$fastcgi_script_name;
        fastcgi_param  PHP_ADMIN_VALUE "open_basedir={homedir}:/usr/share/php:/usr/share/pear \n upload_tmp_dir={homedir}/phptmpdir \n session.save_path={homedir}/phptmpdir";
        fastcgi_read_timeout 300;
        limit_req zone=one burst=5;
    }    

Restart nginx.  The website you configured to use a specific version of PHP will be using that version now.

Set Max File Size System Wide – All Users – Ubuntu

Monday, August 18th, 2025

Set Max File Size System Wide – All Users – Ubuntu

Sometimes, a game server process can crash continually until it is manually restarted.  When this happens, the log file it creates fills up with the same error until the ENTIRE server runs out of disk space.  To prevent that from happening, limit the maximum size a file can grow to by adding the following line to the end of the /etc/profile file to apply it to all users.

ulimit -f 52428800

The above numeric value is kilobytes.  It is set to 50GB in the command above.

Restart the server for it to take effect.

Element for Linux Client – Without Flatpak

Tuesday, February 11th, 2025

Element for Linux Client – Without Flatpak

If you'd like to install the Element Matrix client for Linux without using flatpak or snap, you can use the following script to do so:

sudo apt-get install wget unzip
wget -N "https://dinofly.com/files/linux/element_bash_install.zip" && unzip element_bash_install.zip && sudo bash install_element.sh

This will install the Element client application on Linux, create an app shortcut for it, and add it as an automatic startup program when the computer is first started.

This was tested on Ubuntu 18.04, but it should work on newer versions of Linux as well.

Installing Latest Version of Skype on Ubuntu and Debian with deb – No Snap or Flatpak

Tuesday, February 11th, 2025

Latest Skype for Debian / Ubuntu – Without Flatpak or Snap

I found this script posted on Github that essentially unpacks the last created Skype .deb file released by Microsoft, downloads the latest snap package for Skype, extracts and replaces the Skype binary from the snap package to the deb source files, replaces some version number strings, and then repacks the files into a deb you can install on Ubuntu / Debian.  I modified the script slightly to install some dependencies and then actually install the deb file that is generated for you.

To install the latest version of Skype for Ubuntu / Debian (tested on Ubuntu 18.04 – and should work on newer versions), first uninstall any previous version of Skype you've installed on your system, and then run the following script:

sudo apt-get install wget unzip
wget -N "https://dinofly.com/files/linux/skype_for_linux_deb_install.zip" && unzip skype_for_linux_deb_install.zip && sudo bash skype_for_linux.sh

If after logging in for the first time, your Skype looks like this (a blank page with it not doing anything):

Restart your computer and load Skype again.  It will work fine after this.

Dual Boot Linux (Ubuntu 22.04) and Windows 11 on Modern Systems – UEFI

Thursday, December 7th, 2023

Dual Boot Linux (Ubuntu 22.04) and Windows 11 on Modern Systems – UEFI

In order to setup a dual boot of Windows 11 and Ubuntu 22.04 on a modern system that uses UEFI, follow these steps.

  1. Install Windows 11 first leaving some unpartitioned space (at least 60GB is my recommendation) on the drive you're installing Windows on.
  2. Boot up the Ubuntu installer.
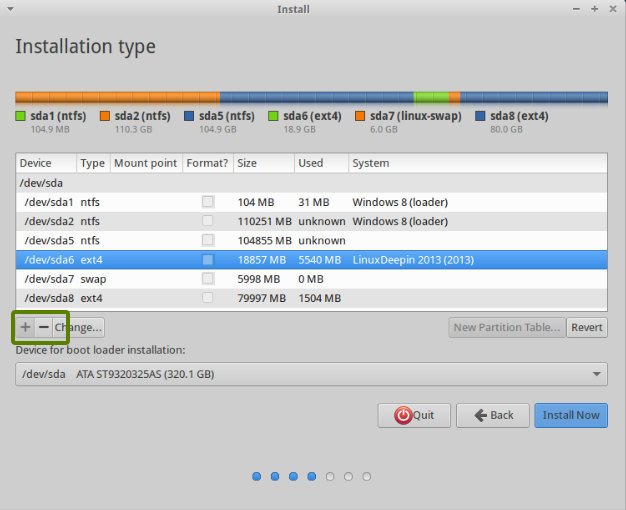
  3. During installation, you'll be presented with an Installation Type options screen.  Choose "Something else". 
  4. On the next screen, you'll see a list of drives and partitions.  On the same drive you installed Windows, create 3 new partitions. 
    1. Create an EXT4 partition for the / mount point at least 40GB in size (this is the main drive for Linux files).
    2. Create a SWAP partition at least 18GB in size.
    3. Create an EFI partition at least 500MB in size.  This is extremely important in order to get grub to install properly. 
  5. Leave the "Device for boot loader installation" set as the top level drive that Windows and Ubuntu was / is being installed on.  You should not select an individual partition here.
  6. Complete the installation process. 
  7. You might need to change the UEFI boot order in the BIOS of your system to boot Ubuntu / Linux first versus booting the Windows EFI partition.  Since you created an EFI partition for your Linux install, it should show up as a bootable option in the bios.  Set / adjust accordingly.
  8. That's it!

Fix for Older SSH Keys Not Working on Newer Versions of Debian / Ubuntu

Thursday, May 25th, 2023

Fix for SSH Keys Not Working on Newer Versions of Debian / Ubuntu

If your old SSH keys are not working on newer versions of Ubuntu / Debian, and you're being prompted to login (~/.ssh/config configuration being ignored), the fix is to add the following line to the bottom of the /etc/ssh/ssh_config file:

    PubkeyAcceptedKeyTypes +ssh-rsa

That's it.  It will work again.  You may need to restart the ssh service

sudo service ssh restart

https://askubuntu.com/questions/1404049/ssh-without-password-does-not-work-after-upgrading-from-18-04-to-22-04

cURL and wget Issues on Ubuntu 16.04 – SSL: TLSV1_ALERT_PROTOCOL_VERSION

Monday, December 5th, 2022

cURL and wget Issues on Ubuntu 16.04

When using wget or curl to make HTTP requests from a no longer supported installation of Ubuntu 16.04 Xenial, if you get any of the following errors:

curl gnutls_handshake() failed: Error in protocol version
curl: (35) error:1407742E:SSL routines:SSL23_GET_SERVER_HELLO:tlsv1 alert protocol version  /home/mohan/mesg
[SSL: TLSV1_ALERT_PROTOCOL_VERSION] tlsv1 alert protocol version (_ssl.c:727) 

The solution is to add SavOS Rob Savoury PPAs to get updated curl and wget packages:

sudo add-apt-repository ppa:savoury1/build-tools
sudo add-apt-repository ppa:savoury1/backports
sudo add-apt-repository ppa:savoury1/python
sudo add-apt-repository ppa:savoury1/encryption
sudo add-apt-repository ppa:savoury1/curl34
sudo apt-get update && sudo apt-get upgrade
sudo apt-get install wget curl python2.7

Ubuntu: Allow Automatic Updates for Specific Packages Only

Tuesday, June 14th, 2022

Ubuntu: Allow Automatic Updates for Specific Packages Only

If you want to allow Google products and packages to update automatically, follow this guide.

You can also add additional sources that should update automatically following the same process.

This is helpful when using Selenium, WebDriver for Chrome, and Python.  Doing this allows you to always use the most up-to-date version of all of these dependent packages.

Tested in Ubuntu 20.04

Fixing Sound in Ubuntu

Wednesday, April 21st, 2021

Fixing Sound in Ubuntu

If your sound quits working randomly after installing updates via the apt system (via sudo apt-get update && apt-get upgrade) or via the Software & Updates graphical program, it's possible that some of the drivers have not been installed with the latest kernel updates.

To fix this, try running the below command:

sudo apt install linux-modules-extra-$(uname -r)

Reboot.  Your sound should hopefully work again!

If the above command doesn't work (older versions of Ubuntu do not have this package), please see the generic information here:

https://itsfoss.com/how-to-fix-no-sound-through-hdmi-in-external-monitor-in-ubuntu/

Intel Original Compute Stick – Keep WiFi from Breaking – Block Kernel Updates and Chestersmill-Settings Updates – Get Latest Software from Ubuntu Advantage

Wednesday, April 21st, 2021

Intel Original Compute Stick – Keep WiFi from Breaking – Block Kernel Updates and Chestersmill-Settings Updates

If you have the original Intel Compute Stick (STCK1A8LFC [1GB of RAM] or STCK1A32WFC [2GB of RAM] models from 2015), you'll need to prevent a few software packages from updating so that these updates won't break your WiFi!  I've never been able to get the WiFi to work with these Intel Compute Sticks running a kernel newer than version 3.16 on any version of Ubuntu.  I've also never been able to get the WiFi to work on anything but Ubuntu 14.04, so you might be stuck having to run this older version of Ubuntu.  Also, updates to the chestersmill-settings package can break your WiFi.  To prevent both scenarios from breaking your WiFi, simply prevent the below packages from being updated.

Preventing packages from being updated can be accomplished using hold statuses in the apt system as explained on AskUbuntu:

https://askubuntu.com/questions/18654/how-to-prevent-updating-of-a-specific-package

Basically, you'll need to run the below commands to prevent WiFi from breaking due to buggy kernel and chestersmill-settings package updates:

sudo apt-mark hold chestersmill-settings
sudo apt-mark hold linux-image-$(uname -r)
sudo apt-mark hold linux-image-generic
sudo apt-mark hold linux-generic

You can now safely update software packages without worrying about your WiFi being broken by kernel and chestersmill-settings package updates!

Get Latest Software from Ubuntu Advantage for Ubuntu 14.04

Ubuntu 14.04 is also still supported via the Extended Security Maintenance (ESM) Ubuntu Advantage program (https://ubuntu.com/advantage).  

To get updated software and packages until April of 2022, you'll need to get an Ubuntu Advantage key.  Get your key using your UbuntuOne account on this page:  https://ubuntu.com/advantage

Now, install the Ubuntu advantage client by using the commands below:

sudo add-apt-repository ppa:ua-client/stable
sudo apt-get update
sudo apt-get install ubuntu-advantage-tools

Set your key using the command below (using your key rather than YOUR_KEY_HERE):

sudo ua attach YOUR_KEY_HERE

Now update and install the upgraded packages available via Ubuntu Advantage:

sudo apt-get update && sudo apt-get upgrade