Archive for the ‘Ubuntu Linux’ Category

Dual Boot Linux (Ubuntu 22.04) and Windows 11 on Modern Systems – UEFI

Thursday, December 7th, 2023

Dual Boot Linux (Ubuntu 22.04) and Windows 11 on Modern Systems – UEFI

In order to setup a dual boot of Windows 11 and Ubuntu 22.04 on a modern system that uses UEFI, follow these steps.

  1. Install Windows 11 first leaving some unpartitioned space (at least 60GB is my recommendation) on the drive you're installing Windows on.
  2. Boot up the Ubuntu installer.
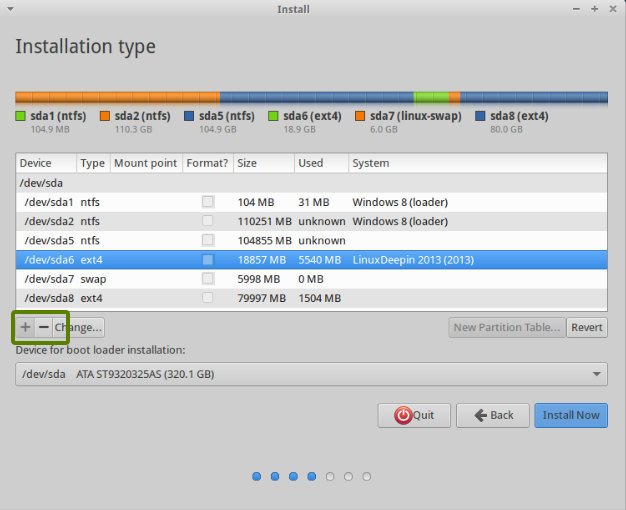
  3. During installation, you'll be presented with an Installation Type options screen.  Choose "Something else". 
  4. On the next screen, you'll see a list of drives and partitions.  On the same drive you installed Windows, create 3 new partitions. 
    1. Create an EXT4 partition for the / mount point at least 40GB in size (this is the main drive for Linux files).
    2. Create a SWAP partition at least 18GB in size.
    3. Create an EFI partition at least 500MB in size.  This is extremely important in order to get grub to install properly. 
  5. Leave the "Device for boot loader installation" set as the top level drive that Windows and Ubuntu was / is being installed on.  You should not select an individual partition here.
  6. Complete the installation process. 
  7. You might need to change the UEFI boot order in the BIOS of your system to boot Ubuntu / Linux first versus booting the Windows EFI partition.  Since you created an EFI partition for your Linux install, it should show up as a bootable option in the bios.  Set / adjust accordingly.
  8. That's it!

Fix for Older SSH Keys Not Working on Newer Versions of Debian / Ubuntu

Thursday, May 25th, 2023

Fix for SSH Keys Not Working on Newer Versions of Debian / Ubuntu

If your old SSH keys are not working on newer versions of Ubuntu / Debian, and you're being prompted to login (~/.ssh/config configuration being ignored), the fix is to add the following line to the bottom of the /etc/ssh/ssh_config file:

    PubkeyAcceptedKeyTypes +ssh-rsa

That's it.  It will work again.  You may need to restart the ssh service

sudo service ssh restart

https://askubuntu.com/questions/1404049/ssh-without-password-does-not-work-after-upgrading-from-18-04-to-22-04

OpenVPN Expired CRL – VPN Won’t Connect

Wednesday, December 7th, 2022

OpenVPN Expired CRL – VPN Won't Connect

Recently, I ran into an issue where OpenVPN was no longer working for existing clients.  After looking at the OpenVPN log in /var/log/openvpn.log, I found the following:

VERIFY ERROR: depth=0, error=CRL has expired:

If you see an OpenVPN error about an expired certificate revocation list (CRL), here's how to generate a new CRL:

cd /etc/openvpn/easy-rsa
EASYRSA_CRL_DAYS=3650 ./easyrsa gen-crl
cp /etc/openvpn/easy-rsa/pki/crl.pem /etc/openvpn/crl.pem
chown nobody:nogroup /etc/openvpn/crl.pem
service openvpn restart

Problem solved!

Support Older TLS Versions in Newer Ubuntu / Debian OS Versions

Monday, December 5th, 2022

Support Older TLS Versions in Newer Ubuntu / Debian OS Versions

Edit openssl.conf file:

sudo nano /etc/ssl/openssl.cnf

Add this line at the top:

openssl_conf = openssl_init

And add these lines at the end:

[openssl_init]
ssl_conf = ssl_sect

[ssl_sect]
system_default = system_default_sect

[system_default_sect]
CipherString = DEFAULT@SECLEVEL=1

https://askubuntu.com/questions/1233186/ubuntu-20-04-how-to-set-lower-ssl-security-level#answer-1296578

cURL and wget Issues on Ubuntu 16.04 – SSL: TLSV1_ALERT_PROTOCOL_VERSION

Monday, December 5th, 2022

cURL and wget Issues on Ubuntu 16.04

When using wget or curl to make HTTP requests from a no longer supported installation of Ubuntu 16.04 Xenial, if you get any of the following errors:

curl gnutls_handshake() failed: Error in protocol version
curl: (35) error:1407742E:SSL routines:SSL23_GET_SERVER_HELLO:tlsv1 alert protocol version  /home/mohan/mesg
[SSL: TLSV1_ALERT_PROTOCOL_VERSION] tlsv1 alert protocol version (_ssl.c:727) 

The solution is to add SavOS Rob Savoury PPAs to get updated curl and wget packages:

sudo add-apt-repository ppa:savoury1/build-tools
sudo add-apt-repository ppa:savoury1/backports
sudo add-apt-repository ppa:savoury1/python
sudo add-apt-repository ppa:savoury1/encryption
sudo add-apt-repository ppa:savoury1/curl34
sudo apt-get update && sudo apt-get upgrade
sudo apt-get install wget curl python2.7

Ubuntu: Allow Automatic Updates for Specific Packages Only

Tuesday, June 14th, 2022

Ubuntu: Allow Automatic Updates for Specific Packages Only

If you want to allow Google products and packages to update automatically, follow this guide.

You can also add additional sources that should update automatically following the same process.

This is helpful when using Selenium, WebDriver for Chrome, and Python.  Doing this allows you to always use the most up-to-date version of all of these dependent packages.

Tested in Ubuntu 20.04

Setup Remote Logging on an Ubuntu rsyslog Server for DD-WRT to Use

Wednesday, June 9th, 2021

Setup Remote Logging on an Ubuntu rsyslog Server for DD-WRT to Use

Enable remote logging on an Ubuntu server by configuring rsyslog to allow remote connections from port 514 (adjust as needed):

sudo nano /etc/rsyslog.conf

Uncomment the imudp and imtcp load module statements like so (adjusting as needed):

# provides UDP syslog reception
module(load="imudp")
input(type="imudp" port="514")

# provides TCP syslog reception
module(load="imtcp")
input(type="imtcp" port="514")

Create a logging template and apply it only to remote hosts that start with "c-" (comcast connection remote host prefix [followed by the IP address of the device which can change])

# Comcast remote logging
$template remote-incoming-logs, "/var/log/remote_logs/%HOSTNAME%/%PROGRAMNAME%.$
if $fromhost startswith "c-" then -?remote-incoming-logs

Save and quit.

Restart the rsyslog daemon:

sudo service rsyslog restart

Remote logs will be stored in /var/log/remote_logs

Configure logrotate to process and rotate these logs automatically (so you don't lose them and have a history on them):

sudo nano /etc/logrotate.d/ddwrt

Paste these contents into the file:

/var/log/remote_logs/*.log /var/log/remote_logs/*/*.log {
    daily
    missingok
    compress
    delaycompress
    su syslog adm
}

Save and quit.

Everything has been configured, and remote logging should work from your DD-WRT router once you set the remote URL to your server's IPAddress:port combo and apply the changed settings.

Fixing Sound in Ubuntu

Wednesday, April 21st, 2021

Fixing Sound in Ubuntu

If your sound quits working randomly after installing updates via the apt system (via sudo apt-get update && apt-get upgrade) or via the Software & Updates graphical program, it's possible that some of the drivers have not been installed with the latest kernel updates.

To fix this, try running the below command:

sudo apt install linux-modules-extra-$(uname -r)

Reboot.  Your sound should hopefully work again!

If the above command doesn't work (older versions of Ubuntu do not have this package), please see the generic information here:

https://itsfoss.com/how-to-fix-no-sound-through-hdmi-in-external-monitor-in-ubuntu/

Intel Original Compute Stick – Keep WiFi from Breaking – Block Kernel Updates and Chestersmill-Settings Updates – Get Latest Software from Ubuntu Advantage

Wednesday, April 21st, 2021

Intel Original Compute Stick – Keep WiFi from Breaking – Block Kernel Updates and Chestersmill-Settings Updates

If you have the original Intel Compute Stick (STCK1A8LFC [1GB of RAM] or STCK1A32WFC [2GB of RAM] models from 2015), you'll need to prevent a few software packages from updating so that these updates won't break your WiFi!  I've never been able to get the WiFi to work with these Intel Compute Sticks running a kernel newer than version 3.16 on any version of Ubuntu.  I've also never been able to get the WiFi to work on anything but Ubuntu 14.04, so you might be stuck having to run this older version of Ubuntu.  Also, updates to the chestersmill-settings package can break your WiFi.  To prevent both scenarios from breaking your WiFi, simply prevent the below packages from being updated.

Preventing packages from being updated can be accomplished using hold statuses in the apt system as explained on AskUbuntu:

https://askubuntu.com/questions/18654/how-to-prevent-updating-of-a-specific-package

Basically, you'll need to run the below commands to prevent WiFi from breaking due to buggy kernel and chestersmill-settings package updates:

sudo apt-mark hold chestersmill-settings
sudo apt-mark hold linux-image-$(uname -r)
sudo apt-mark hold linux-image-generic
sudo apt-mark hold linux-generic

You can now safely update software packages without worrying about your WiFi being broken by kernel and chestersmill-settings package updates!

Get Latest Software from Ubuntu Advantage for Ubuntu 14.04

Ubuntu 14.04 is also still supported via the Extended Security Maintenance (ESM) Ubuntu Advantage program (https://ubuntu.com/advantage).  

To get updated software and packages until April of 2022, you'll need to get an Ubuntu Advantage key.  Get your key using your UbuntuOne account on this page:  https://ubuntu.com/advantage

Now, install the Ubuntu advantage client by using the commands below:

sudo add-apt-repository ppa:ua-client/stable
sudo apt-get update
sudo apt-get install ubuntu-advantage-tools

Set your key using the command below (using your key rather than YOUR_KEY_HERE):

sudo ua attach YOUR_KEY_HERE

Now update and install the upgraded packages available via Ubuntu Advantage:

sudo apt-get update && sudo apt-get upgrade

The Dangers of Using tcp_tw_recycle in Linux – Strange Intermittent Timeout Issues

Wednesday, January 13th, 2021

Do Not Use tcp_tw_recycle

I had a very strange connectivity issue recently that I was only able to reproduce intermittently on my own LAN network when connecting to a few of my servers hosting websites that process and receive tons of simultaneous connections at any point in time.  Basically, my connection to a specific set of websites that I host would timeout from my home internet connection.  However, I was never able to reproduce this issue when connecting to the same sites from other networks belonging to my family and friends. 

From my home connection, I used TCPView and saw that SYN_SENT packets were supposedly sent to my servers to establish a connection.  Unfortunately, the server never replied to some of these requests.  As such, my connection would timeout at times, and work perfectly fine sometimes.  I looked at DD-WRT's connection table, and it also claimed that the packets had been sent, but that they were in an UNREPLIED state when I experienced issues.  Thus, packets were supposedly being sent, but the server was not responding at times.  After spending nearly a week trying to tackle this issue and buying new cable internet equipment (an officially supported Comcast modem), I tracked down the issue, and it ended up being a TCP configuration setting on my servers rather than my home LAN equipment.

Modem or Router's Fault?

Originally, I thought my issue was caused by the DD-WRT open source firmware I was running on my wireless router.  If I restored the router's settings to DD-WRT's factory defaults, I could always connect to the websites I was having intermittent connection timeout issues on.  I suspected it might be my router after trying an older router which didn't have any problems either.  I even upgraded the DD-WRT firmware to the latest version and rebuilt my complicated network configuration from scratch.  Unfortunately, the issue was still there.  Thus, despite mixed results with different routers, I started to wonder if the issue was on my server's end.

Finally Fixed

I started looking at sysctl TCP settings I could adjust on my router, and I ended up comparing some of these values to the ones used on my servers (that were hosting the problem websites).  Eventually, I came across configuration values I had changed myself several months ago which were supposed to help the server support multiple simultaneous connections.

After reading this StackOverflow thread (https://stackoverflow.com/questions/6426253/tcp-tw-reuse-vs-tcp-tw-recycle-which-to-use-or-both), I decided I would try disabling the tcp_tw_recycle setting.

/proc/sys/net/ipv4/tcp_tw_recycle was set to 1 (enabled) from tweaks I had run that I had found on the internet.  After I disabled it, /proc/sys/net/ipv4/tcp_tw_recycle was set to 0 (disabled).  By default, Linux keeps tcp_tw_recycle disabled.  Again, this is something I had changed for tuning reasons.  After disabling this setting and rebooting the server, I no longer have any issues connecting to the severs in question.  No more connection timeouts, and everything works properly again.

I have no idea why I wasn't able to reproduce this issue on other networks.  I thought it was my network equipment (modem and router), but it ended up being the server.

Lessons Learned

Be careful when applying settings you find online.  Sometimes, they may not work, or their usage may be buggy.  In fact, net.ipv4.tcp_tw_recycle has been removed from Linux in kernel versions newer than 4.12 by default.  I'm guessing this is because it doesn't work, as I experienced.  Do NOT use  net.ipv4.tcp_tw_recycle! I kept tcp_tw_reuse enabled, so you can enable this setting without running into problems.  Just don't for the love of anything use tcp_tw_recycle!  It doesn't work, and it will cause you headaches trying to track down strange intermittent issues!