Archive for the ‘Linux’ Category

Changing Servers for a Website – Redirect Traffic to New IP for No Downtime While DNS Propagates

Wednesday, December 20th, 2023

Moving a Website to Another Server – Redirect Traffic to the New Server While DNS Propagates (for No Downtime)

If you're migrating a website from one server to another and have updated the DNS for the domain to point to the new server, some traffic will still be directed to the old server due to DNS caching.  So, while the DNS changes propagate over the internet (can take up to three days), you can still redirect traffic to the new server from the old server so that you won't suffer any downtime. 

On the old server, run these commands to redirect web traffic on port 80 (http) and port 443 (https) to the new server (adjust the {DESTINATION_IP_ADDRESS} variable accordingly):

echo 1 >/proc/sys/net/ipv4/ip_forward
iptables -t nat -A PREROUTING -p tcp --dport 80 -j DNAT --to-destination {DESTINATION_IP_ADDRESS}:80
iptables -t nat -A PREROUTING -p tcp --dport 443 -j DNAT --to-destination {DESTINATION_IP_ADDRESS}:443
iptables -t nat -A POSTROUTING -p tcp -d {DESTINATION_IP_ADDRESS} --dport 80 -j MASQUERADE
iptables -t nat -A POSTROUTING -p tcp -d {DESTINATION_IP_ADDRESS} --dport 443 -j MASQUERADE

Reference:  https://serverfault.com/questions/371833/changing-servers-redirect-to-new-ip-no-downtime#371870

Dual Boot Linux (Ubuntu 22.04) and Windows 11 on Modern Systems – UEFI

Thursday, December 7th, 2023

Dual Boot Linux (Ubuntu 22.04) and Windows 11 on Modern Systems – UEFI

In order to setup a dual boot of Windows 11 and Ubuntu 22.04 on a modern system that uses UEFI, follow these steps.

  1. Install Windows 11 first leaving some unpartitioned space (at least 60GB is my recommendation) on the drive you're installing Windows on.
  2. Boot up the Ubuntu installer.
  3. During installation, you'll be presented with an Installation Type options screen.  Choose "Something else". 
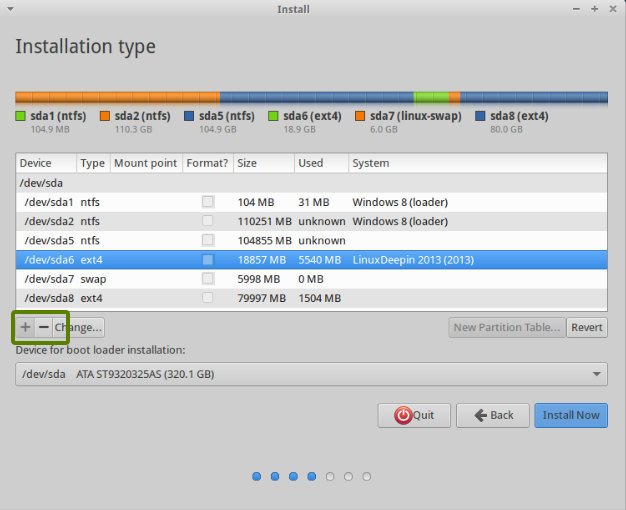
  4. On the next screen, you'll see a list of drives and partitions.  On the same drive you installed Windows, create 3 new partitions. 
    1. Create an EXT4 partition for the / mount point at least 40GB in size (this is the main drive for Linux files).
    2. Create a SWAP partition at least 18GB in size.
    3. Create an EFI partition at least 500MB in size.  This is extremely important in order to get grub to install properly. 
  5. Leave the "Device for boot loader installation" set as the top level drive that Windows and Ubuntu was / is being installed on.  You should not select an individual partition here.
  6. Complete the installation process. 
  7. You might need to change the UEFI boot order in the BIOS of your system to boot Ubuntu / Linux first versus booting the Windows EFI partition.  Since you created an EFI partition for your Linux install, it should show up as a bootable option in the bios.  Set / adjust accordingly.
  8. That's it!

Fix for Older SSH Keys Not Working on Newer Versions of Debian / Ubuntu

Thursday, May 25th, 2023

Fix for SSH Keys Not Working on Newer Versions of Debian / Ubuntu

If your old SSH keys are not working on newer versions of Ubuntu / Debian, and you're being prompted to login (~/.ssh/config configuration being ignored), the fix is to add the following line to the bottom of the /etc/ssh/ssh_config file:

    PubkeyAcceptedKeyTypes +ssh-rsa

That's it.  It will work again.  You may need to restart the ssh service

sudo service ssh restart

https://askubuntu.com/questions/1404049/ssh-without-password-does-not-work-after-upgrading-from-18-04-to-22-04

OpenVPN Expired CRL – VPN Won’t Connect

Wednesday, December 7th, 2022

OpenVPN Expired CRL – VPN Won't Connect

Recently, I ran into an issue where OpenVPN was no longer working for existing clients.  After looking at the OpenVPN log in /var/log/openvpn.log, I found the following:

VERIFY ERROR: depth=0, error=CRL has expired:

If you see an OpenVPN error about an expired certificate revocation list (CRL), here's how to generate a new CRL:

cd /etc/openvpn/easy-rsa
EASYRSA_CRL_DAYS=3650 ./easyrsa gen-crl
cp /etc/openvpn/easy-rsa/pki/crl.pem /etc/openvpn/crl.pem
chown nobody:nogroup /etc/openvpn/crl.pem
service openvpn restart

Problem solved!

cURL and wget Issues on Ubuntu 16.04 – SSL: TLSV1_ALERT_PROTOCOL_VERSION

Monday, December 5th, 2022

cURL and wget Issues on Ubuntu 16.04

When using wget or curl to make HTTP requests from a no longer supported installation of Ubuntu 16.04 Xenial, if you get any of the following errors:

curl gnutls_handshake() failed: Error in protocol version
curl: (35) error:1407742E:SSL routines:SSL23_GET_SERVER_HELLO:tlsv1 alert protocol version  /home/mohan/mesg
[SSL: TLSV1_ALERT_PROTOCOL_VERSION] tlsv1 alert protocol version (_ssl.c:727) 

The solution is to add SavOS Rob Savoury PPAs to get updated curl and wget packages:

sudo add-apt-repository ppa:savoury1/build-tools
sudo add-apt-repository ppa:savoury1/backports
sudo add-apt-repository ppa:savoury1/python
sudo add-apt-repository ppa:savoury1/encryption
sudo add-apt-repository ppa:savoury1/curl34
sudo apt-get update && sudo apt-get upgrade
sudo apt-get install wget curl python2.7

Ubuntu: Allow Automatic Updates for Specific Packages Only

Tuesday, June 14th, 2022

Ubuntu: Allow Automatic Updates for Specific Packages Only

If you want to allow Google products and packages to update automatically, follow this guide.

You can also add additional sources that should update automatically following the same process.

This is helpful when using Selenium, WebDriver for Chrome, and Python.  Doing this allows you to always use the most up-to-date version of all of these dependent packages.

Tested in Ubuntu 20.04

Setup Remote Logging on an Ubuntu rsyslog Server for DD-WRT to Use

Wednesday, June 9th, 2021

Setup Remote Logging on an Ubuntu rsyslog Server for DD-WRT to Use

Enable remote logging on an Ubuntu server by configuring rsyslog to allow remote connections from port 514 (adjust as needed):

sudo nano /etc/rsyslog.conf

Uncomment the imudp and imtcp load module statements like so (adjusting as needed):

# provides UDP syslog reception
module(load="imudp")
input(type="imudp" port="514")

# provides TCP syslog reception
module(load="imtcp")
input(type="imtcp" port="514")

Create a logging template and apply it only to remote hosts that start with "c-" (comcast connection remote host prefix [followed by the IP address of the device which can change])

# Comcast remote logging
$template remote-incoming-logs, "/var/log/remote_logs/%HOSTNAME%/%PROGRAMNAME%.$
if $fromhost startswith "c-" then -?remote-incoming-logs

Save and quit.

Restart the rsyslog daemon:

sudo service rsyslog restart

Remote logs will be stored in /var/log/remote_logs

Configure logrotate to process and rotate these logs automatically (so you don't lose them and have a history on them):

sudo nano /etc/logrotate.d/ddwrt

Paste these contents into the file:

/var/log/remote_logs/*.log /var/log/remote_logs/*/*.log {
    daily
    missingok
    compress
    delaycompress
    su syslog adm
}

Save and quit.

Everything has been configured, and remote logging should work from your DD-WRT router once you set the remote URL to your server's IPAddress:port combo and apply the changed settings.

CentOS LVM and Software RAID Partitioning Instructions

Sunday, May 30th, 2021

Installing and Configuring CentOS to Host KVM Virtual Machines

GUI

When configuring a fresh install of CentOS for a KVM host machine (the main server that hosts all of the virtual machines), I like to run a GUI to make managing some of the virtual machines easier.  Thus, during install, choose the options for CentOS with Minimal GUI:

RAID 10 LVM Partitions

When configuring the hard drive partitions, set it up to use RAID 10 LVM SOFTWARE RAID:

Create volume group called "vms" without the quotes that is setup as RAID 10 (set volume group space to be as large as possible).

Set the "/" partition to 100GB XFS LVM (RAID10).

Set the "swap" partition to 32GB.

Only setup those two partitions.  The remaining space in the RAID 10 volume group "vms" will be used for KVM containers (and the remaining space does NOT need to be assigned to any mount points).

That's all.

Increasing KVM Guest Hard Disk (Hard Drive) Space

Sunday, May 30th, 2021

Increasing KVM Guest Hard Disk (Hard Drive) Space

Increasing the hard drive space in a KVM guest can be rather tricky.  The first step is to shutdown (completely turn off) the guest machine by running the below command from the guest system:

sudo shutdown -h now

Once the guest machine has been turned off (verify it is off by using sudo virt-manager on the host machine to see if it's no longer running), on the host machine, resize the LVM partition by running the following command (and adjust the size as necessary):

sudo lvextend -L+78G /dev/vg_vps/utils

If you need help identifying the name of the disk your guest has been assigned, run this command from the host:

sudo virsh domblklist {VIRSH_NAME_OF_VIRTUAL_MACHINE}

For my example, I would use this command:

sudo virsh domblklist utils

From the host machine, download the GParted live ISO image for your system's architecture (x86 or x64).  Start virt-manager:

sudo virt-manager

Assign a CD drive to the virtual machine you're expanding the hard drive space for, and assign / mount the GParted ISO to it.  Change the boot order so that the KVM guest boots from the CD first.  Save your settings and start the KVM guest virtual machine.  Boot into GParted Live.  GParted will run automatically.  Use GParted to expand the partitions so that they make use of the added storage based on your own preferences.  Apply the resize operation.  Exit GParted and shutdown the virtual machine so that it's off again. Remove the CD drive from the boot options from virt-manager, and then start the KVM guest again. 

If Guest Doesn't Use LVM Partitioning

If your KVM guest virtual machine hasn't been configured to use LVM, the added hard drive space should already be available to your system.  Verify it has been expanded by again running the df -h command.  You're done!

If Guest Uses LVM

Let the OS boot.  From the guest, the file system needs to be resized itself.  You can do this by running the following command to see the current space allocated to your system's partitions:

df -h

You'll see a bunch of output similar to:

Filesystem                  Size  Used Avail Use% Mounted on
udev                        2.9G     0  2.9G   0% /dev
tmpfs                       597M  8.3M  589M   2% /run
/dev/mapper/utils--vg-root  127G   24G   98G  20% /
tmpfs                       3.0G     0  3.0G   0% /dev/shm
tmpfs                       5.0M     0  5.0M   0% /run/lock
tmpfs                       3.0G     0  3.0G   0% /sys/fs/cgroup
/dev/vda1                   720M   60M  624M   9% /boot
tmpfs                       597M     0  597M   0% /run/user/1000

You'll notice that the added hard drive space doesn't show up on any of the partitions.  However, it is available to be assigned to these partitions.  To assign additional space, you will need to resize it using these commands (run from the guest virtual machine… the machine you're resizing):

lvextend /dev/mapper/utils--vg-root -L +78G
resize2fs /dev/mapper/utils--vg-root

Obviously, you need to substitute the name of the LVM partition with the one from your system shown in your output of the df -h command.

Resources

https://tldp.org/HOWTO/LVM-HOWTO/extendlv.htmlMirror if Offline

https://sandilands.info/sgordon/increasing-kvm-virtual-machine-disk-using-lvm-ext4Mirror if Offline

Adding SAS RAID Drivers to CentOS 8 and Red Hat Linux During Installation

Friday, April 30th, 2021

Adding SAS RAID Drivers to CentOS 8 and Red Hat Linux During Installation

CentOS 8 and Red Hat Linux 8 removed a lot of built in RAID controller and SAS drivers.  As such, you'll need to identify your SAS RAID controller card model number, and then during the installation of CentOS 8 or Red Hat, you will need to follow these instructions (modifying them for your hardware).

https://gainanov.pro/eng-blog/linux/rhel8-install-to-dell-raid/

If for some reason the link above is no longer available, I saved and archived a copy which can be read here.

Add El Repo Permanently

As updates are released to CentOS 8 / Rocky Linux / Red Hat 8, the kernel will often be upgraded.  To make sure the SAS drives are updated as well, you'll need to configure your system to pull updates from El Repo automatically by using the following commands:

sudo rpm --import https://www.elrepo.org/RPM-GPG-KEY-elrepo.org
sudo yum install https://www.elrepo.org/elrepo-release-8.el8.elrepo.noarch.rpm
sudo yum update -y

In case the above instructions no longer work, this guide should help.

Disable NetworkManager Wait Online Service

Prevent the boot from being halted on startup by network connection checks by running the below command:

sudo systemctl mask NetworkManager-wait-online.service