Dual Boot Linux (Ubuntu 22.04) and Windows 11 on Modern Systems – UEFI

Thursday, December 7th, 2023

Dual Boot Linux (Ubuntu 22.04) and Windows 11 on Modern Systems – UEFI

In order to setup a dual boot of Windows 11 and Ubuntu 22.04 on a modern system that uses UEFI, follow these steps.

  1. Install Windows 11 first leaving some unpartitioned space (at least 60GB is my recommendation) on the drive you're installing Windows on.
  2. Boot up the Ubuntu installer.
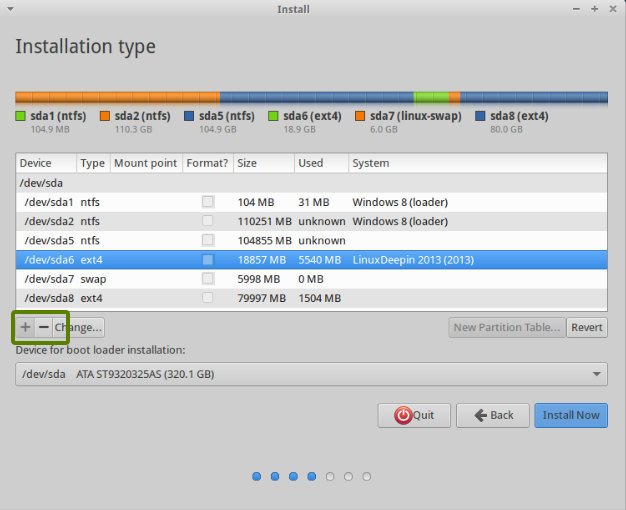
  3. During installation, you'll be presented with an Installation Type options screen.  Choose "Something else". 
  4. On the next screen, you'll see a list of drives and partitions.  On the same drive you installed Windows, create 3 new partitions. 
    1. Create an EXT4 partition for the / mount point at least 40GB in size (this is the main drive for Linux files).
    2. Create a SWAP partition at least 18GB in size.
    3. Create an EFI partition at least 500MB in size.  This is extremely important in order to get grub to install properly. 
  5. Leave the "Device for boot loader installation" set as the top level drive that Windows and Ubuntu was / is being installed on.  You should not select an individual partition here.
  6. Complete the installation process. 
  7. You might need to change the UEFI boot order in the BIOS of your system to boot Ubuntu / Linux first versus booting the Windows EFI partition.  Since you created an EFI partition for your Linux install, it should show up as a bootable option in the bios.  Set / adjust accordingly.
  8. That's it!

Ubuntu Grub Fails to Install on RAID Array

Friday, February 6th, 2015

Ubuntu Grub RAID Issues

Grub Fails To Install on RAID Array

If grub fails to install on your RAID array in any version of Ubuntu, do NOT disable your BIOS RAID! The correct solution is at this blog entry. I'll summarize it below.

At the stage of the install where it is attempting to install GRUB it will detect as

/dev/mapper

This is incomplete! That's why the GRUB install fails.

You need the actual name of the RAID array to install to. So during that step, press ctrl+alt+F2 to drop to a busybox terminal, then enter

ls -l /dev/mapper

Pick out the name of your array from the list shown, then press ctrl+alt+F1 to switch back to the install (you can switch back and forth as much as you like with no problems) and enter it in the field as

/dev/mapper/{your array name}  

Then GRUB installs perfectly and you're ready to go, with a proper BIOS RAID array intact.

System Won't Boot After Grub Failed to Install

If your system will no longer boot because you skipped installing or updating grub, you need to download an Ubuntu version that does support RAID, boot from the LIVE CD, drop to a terminal, and then run:

ls -l /dev/mapper
sudo grub-install /dev/mapper/{ARRAY_NAME_HERE}

Setting Up RAID Array During Ubuntu Install

If you are configuring a BIOS RAID array for the first time on Ubuntu, you should create a 1MB boot partition.  Its partition type is "boot".  If you do this, grub will always try to install there and will succeed every time without failing when upgrading or reinstalling grub.